Tuesday, December 25, 2007

Christmas Pics

MERRY CHRISTMAS!


I hope each of you have had a wonderful Christmas. We had a good day. First we opened presents at our house, then we went to my Dad's and opened presents with him, and then he went with us to my in-law's for dinner, more presents, and visitng thru the early evening.


Here are a few pics from Christmas Eve & Christmas Day.

Christmas Eve


My personal tradition: an "after everyone is in bed and Santa has arrived" picture of the Christmas tree. As you can see in the pic, Sasha & Sam were "helping" me.


Christmas Day

Kendra's cat, Sam is surrounded by the cats' new toys and can't decide what to play with first.


What would Christmas morning be without those "oh so glamourously dressed" opening presents photos???

This green chair was the #1 item on Kendra's wish list.

Below: Tim is opening an Optimus Prime (Transformer) from a family in the church. He's also looking thru an exploding box I made him of pics of his cat Prissy. Prissy died last April.


Ian's mission of the morning was to hit Kendra's cat Sam with a ball of tissue paper. He finally succeeded.


Ian's cat, Tigger, enjoying Kendra's new chair.


At my in-law's house:

Dad opening a present -- Tim's dad is seen teasing Kendra in the background. Ian enjoys watching someone else tease her.


Kendra with the first item for her hope chest (no she doesn't have the actual cedar chest yet).


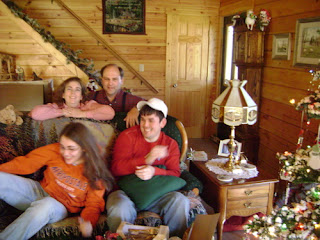
I wanted a picture of the 4 of us taken today. This turned out to be much tougher than I thought. Our camera is good at taking blurry shots so those that had all 4 of us looking at the camera were blurry and the rest....well, you'll see..... :)


Monday, December 17, 2007

What Inspires You & Love #3

Okay, so I have been way too busy lately and haven't had time for much stamping. Usually after work I come home, put my jammies on and surf the net and watch my soaps (I tape The Young and the Restless and As the World Turns). This brings me to what inspires me to stamp, it can be a color combo, a layout or maybe an image that I really like. I recently bought some flannel jammies and that is what inspired me for my Christmas cards this year. Here are my jammies and here is the card I came up with. I have had this Penny Black stamp of the two deer for a few years now and I was thrilled to use it for some of my cards. The base card is brown shimmer cardstock and then I layered pink Bazzill bling and light pint Bazzill cardstock that I embossed with my Cuttlebug and Snowflake embossing folder. This card is 5" x 7" so I had to cuttlebug half and then move the folder over and do the other half, and it worked just fine. I stamped the deer with Brown Versacolor ink. I notched the corners of the image and layers with my 1/2" round punch. I just put the tip of the panel in the punch and snipped it off. It's like having two punches in one! I just love that! I wanted the brads to be glittery so I wrapped each one with a Mini Glue Dot (love these) and dipped them in crystal glitter. It is hard to tell, but I added a little twinkle to the eyes of the deer with Diamond Stickles.

What I love #3

Penny Black stamps! I can't begin to tell you how many I have. My favorites are the Brushstroke images and the words/phrases. I own several of the cuter images also. I buy them here. Here are two cards made with a couple of my favorite images.

I would love to hear about your favorite things too!

Sunday, December 9, 2007

Christmas Tags

For some of my gifts this year, I decided to make my own tags. For some, I'm altering blank 2"x6" bookmarks. This way, they can be used even after they've done their job as a package tag. I used some more of Basic Gray's Figgy Pudding line for these. I used the BG papers & fibers, Offray ribbon and some stickles for accents & sparkle.


Chistmas Cards

I've made a variety of Christmas cards this year. Here are a few pics of them:

I made some for a swap on Scraps-N-Such. I used Basic Gray's Figgy Pudding line and a stamp set from CTMH. I stamped directly on the ribbon and added some stickles for a little sparkle.


I used papers and stamp sets from Stampin' Up to make the following cards. I love to make the envelopes coordinate with my cards -- you see a few of those here.


Monday, December 3, 2007

Things I love #2

#2
Just about anyone who has ever taken one of my classes knows that my all time favorite embellishment is Stickles Glitter Glue. Stickles can add lots of pizazz to even the dullest of cards. My fav colors are Diamond, Star Dust and Crystal. It is a little hard to see in this pic but my DH drilled some holes into a wood block for me so that I can store my nearly empty bottles in. Ya know, I want to use every last bit I can. :)
If you have never tried it, run don't wank to your nearest store to get some. I get mine from here. Sharon tries to keep all of the colors in stock.

Fun Folds

I recently taught a class on fun folds. You know we get in a rut and do the same standard folds all too often. Let me start by saying, I am nuts about surfing the web for ideas. This first card I have seen called Joy Fold card and you can find the instructions here. It is kinda hard to see in this pic but I stamped the pinecone stubby stamp from Stamps by Judith on the left fold of the card and the pine sprig stamp also from Judith on the right side of the brown Bazzill card. I stamped the pine sprig again in green on the larger cream confetti layer that Iused under the main image layer. The main image pinecone is from Inkadinkado and I just love it! Actually I have always liked pinecone stamps. Wierd! It is hard to tell, but the pinecone and pine branches are covered with Diamond Stickles. The next card is a double pocket card and although it uses a whole sheet of 8 1/2 x 11 cardstock, the results are worth it. For this card I used SEI Mistletoe cardstock, a flourish from my Fancy Pants Bella Brush set and the Hero Arts Flourish Frame and Many Birds stamps. I used Brown VersaColor Ink and Lettuce Adirondack in for the tree and pot. I found the idea for the tree and pot in the Hero Arts Fall Supplement. I used Vanilla Versacolor ink for the flourishes on the tags. It is also hard to tell on this card, but I used Diamond Stickles on the tree and on the swirls on the pot. I can't remember where I saw the instructions for this one, but If I have time tomorrow, I will upload a tutorial for you.

Saturday, December 1, 2007

Things I Love

For today, I wanted to share the website of one of our very talented local artists. Garden Path Beads is owned by Maria Grimes, whom I met while working at The Cat's Meow. Maria creates lampwork glass beads and has a wonderful, whimsical style. From time to time Maria has an auction on her website for some of her awesome beads and all of the money goes to charity. The money (100%) from her current auction will go to Toys For Tots. I know Maria would love for you to stop in for a look around. Be sure to check out her gallery, you will be amazed.

On the stamping front, I took some photos today a couple of cards and some sweet treats. I will upload pics tomorrow.

More things I love coming soon.

Thursday, November 29, 2007

Catching up

Boy how time is flying by. Thanksgiving came and went so fast. I spent the day with my family at my In-Laws house and then went to my sister's house for round two and spent the night with my Mom. On Friday morning, I opened my eye at 5:00 am to my Mom saying "lets get dressed and go to your sisters and surprise her" I told her she was nuts and went back to sleep. Mom didn't even want to go shopping (neither did I for that matter) she just wanted to "surprise" my sister. Yeah right, who wants someone knocking on their door at 5:00 am with nothing more than an empty coffee cup in their hand. The twisted part is, my sister probably would have been okay with it. Yes, I said twisted! I do love them though!

On the stamping front, I have a couple of cards from my last class that I need to take pictures and will upload in the next day or two. I also have my annual Sweet Treats class coming up on Saturday and I will get pictures taken of those also. Starting on the first of December I am going to put on my best Oprah face start sharing some of my favorite things with you. I just love her favorite things show and dream of being in her audience one day.

Until next time...........hugs to all.

Monday, November 19, 2007

Lets have a little blog fun!

You Would Be a Pet Dog

You're friendly, loyal, and an all around good sport. People love to be near you.
You are very open with your feelings, and you're quite vocal in expressing them.
You are sincere and kind. You love many people - without any sort of agenda.

Why you would make a great pet: You're content to chill out with your friends

Why you would make a bad pet: You always find yourself getting into trouble

What you would love about being a dog: Running around and playing

What you would hate about being a dog: Being left home alone while everyone else is out having fun

Wednesday, November 14, 2007

Glittery Pinecones

These are a couple of potential Christmas cards for this year. I am not sure which one I like more. One thing I do know is I am loving the new mini (1/8") rick rack that Sharon got in at the store. I think there are 16 colors in all. For these two cards, I used brown, red and green. I love lots of layers on a card and my intention was to CASE* this card but my Pinecone image was a little larger than the central image on the inspiration card and I just couldn't make it look good with the paper arranged like that. I tweeked it a bit and am very happy with how it turned out. On the first card, I cut an extra pinecone and cut each of the "petals" on the pinecone with my craft knife and pushed them out a bit from the backside. I adhered it with a glue dot on the top edge of the pinecone and another on the bottom edge so this allowed the pinecone to look rounded. I then put some Diamond Stickles on each of the pinecone petals. I used Crystal Stickles on the pine sprigs. Here is a close-up photo of the pinecone. For the next card I was just trying to use the scrap print cardstock that I had left. It is a much simpler version and might be the better choice for mass production. For both cards I used Bazzill Brown, Red Linen, cream cardstocks. The print cardstock is from my Memory Box 6 x 6 "Studio" pad. The pinecone image if from Inkadinkado. I haven't found words for the inside yet. On the first card the ribbon is tied to hardware from We R Memory Keepers and red brads from my stash were used. For the second card I used a copper clipiola for the ribbon and copper brads from my stash. Both cards were distressed on the edges to give them that shabby look. You can click on any of the pictures to see them bigger. I would love to see your Christmas cards, feel free to leave me a comment with a link so that I can check them out. Hugs to all!

*CASE (Copy and Share Everything)

Tuesday, November 13, 2007

The Red Room--Lots of pictures

Got your attention, didn't I? When we bought our house, my hubby said he didn't think I would like that room because the walls were red. I took one look and said " I love it, it can be my studio". Not sure he liked hearing that one as the room is 400 square feet. There is a lot of light in the room, which I really like. I still need to work on the window treatments. I have valances (custom made by my AWESOME aunt) but I need shades of some sort. We compromised and I got half to turn into my craft room, stamp room, studio (whatever you want to call it) so I thought I would share some pics of my "space" with you. The first pic is of my desk that David made for me. I was standing in the doorway when I took the pic. The next was taken from the doorway also and is the space to the right of my desk. The table is my manicurist table that I am using for my Cuttlebug station. This corner is still a work in progress. The rattan units still have nail stuff in them. I hope to hang my french board on the wall above the table. The next picture is my 12 x 12 paper storage and my ink pad storage unit hanging on the wall. My most used punches are on top of the ink pad holder and the smaller punches are in the little basket on the floor. The white wire basket is where I keep my gallon baggies of scraps. I have them sorted by color families (kinda). This area is just to the left of my desk. The next pic is of the cabinets. They were already in the room when we looked at the house. Another bonus! There are three sections of cabinets but I only use two for stamping/crafting. I will show you the cabinets closed and then open. The first open pic is where I have my stamps, some punches, a box with re-inkers and extra ink pads. Lots of people are surprised to find out that after stamping for 14+ years, I don't have more stamps than I do. They are stacked 3 high in some of the boxes, but I tend to used them and then get rid of them. The only stamps I don't get rid of are sayings/phrases. The next pic is the bottom of the cabinet and it has two 6-drawer Iris carts in it. One has 8 1/2 x 11 paper and the other has embossing powders, embellishments, clear bags and who really knows what else! The top of the next cabinet is really scary. It has so much stuff in it. The two plastic containers on the top shelf have unmounted stamps in them. I rarely ever open those boxes. I know thats bad, bad, bad. The rest is alterable items, envelopes, card/envelope sets and "other craft supplies. The last cabinet is just under that messy one. It has reams of cardstock, and misc jargon (as my son, Jon would say) in it. The Iris cart has my polymer clay and supplies in the top two, okay maybe three drawers. I really can't tell you what is in the bottom drawers right now. The pink box is for my clear stamp sets. Usually they are piled on my desk though. I hope you have enjoyed your tour of my studio. I will have a couple of cards for you tomorrow. Just need to take some pictures of them. TTFN!

Saturday, November 10, 2007

Shoeboxin' - part 2

Here are the final 3 cards from the Shoebox swap. The first one is Peggy's card. The base card is gold glossy cardstock and the print papers are from Daisy D's. Seasons Greetings (Inkadinkado) was stamped in black ink and then I added some Diamond Stickles to it. The ornament is hanging from some gold cord. (a little hard to see) and tied with 1/4" red organdy ribbon. I added a little Stickles to the print on the ornament also.

The next card is Robin's creation. The base card is cream matte cardstock. The red foiled swirl cardstock is from SEI and is layered to matte gold cardstock. The image is embossed on cream cardstock with detail gold powder. The image and words are one stamp from Inkadinkado. The card is tied with gold mesh ribbon.

The final card is mine. I used lavendar Bazzill for the base and the plaid print is from Paper Salon. The snowflake stamps are from Gelatins and the word Joy is from Printworks. I glittered it up with Star Dust Stickles. Ribbons are dusty blue, mint green and lavendar 1/8" satin ribbon.

Thursday, November 8, 2007

Shoeboxin'

Last Friday a few of us got together to do a shoebox swap. We normally have 12 players, but due to scheduling and time constraints there were only 6 this time. We had a great time and I even won a door prize! Woo Hoo! I will show you 3 cards tonight and the other 3 tomorrow night, so stay tuned.

The theme for this round was holidays.

This first card was created by Doreen. Isn't this little turkey the cutest? The turkey is from Great Impressions and the Happy Thanksgiving saying is from Inkadinkado. The pumpkin and tips of Mr. Turkey's wings are all sparkled up with Orange Stickles. I just love the way Doreen used the Cuttlebug to emboss the background for Mr. Turkey.

The next card is Ginger's. It is hard to tell but the base card is brown shimmer cardstock and it is just gorgeous. Ginger embossed the Stampington image with White Diamond EP and the Impress word stamp was stamped in Pearlescent Chocolate Brilliance ink. Ginger always uses the teeniest little strips of paper to accent her work and she did it again with this card. She put one of her little strips under the bow to mimmick the pine sprigs. Too clever!

The last card for today was created by Liz. Liz used lots of wonderful fall colored Bazzill cardstock, some black magic mesh, a ginormous maple leaf punch and stamps from ?? (I will ask her tomorrow and update) One thing that Liz always does is decorate/stamp the inside of her cards. I just love that!
A tip for you: If you want to Cuttlebug your stamped background, be sure to stamp first, cuttlebug second.